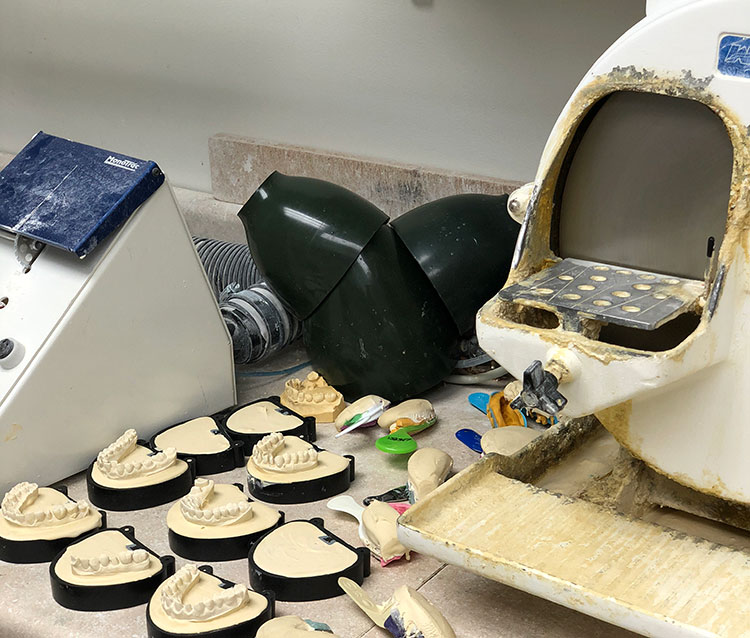
When pouring dental models, the goal should always be to produce an exact replica of a patient’s teeth and adjacent tissues.
Accurate models are critical for production of fixed restorations and removable appliances. Using standard techniques for preparing the impression, mixing the stone, filling the impression, and trimming the final model helps ensure that restorations and appliances will be functional and esthetically pleasing.
Many dentists delegate pouring of models to auxiliary staff. The following tips are good reminders not only for experienced dentists but can also be used to train staff, so they produce accurate casts every time.
Prepare the Impression
Disinfect the impression then rinse it under cool running water to remove residual disinfecting liquid and debris. Shake out excess water and apply a gentle spray of compressed air.
For mandibular impressions, add a small amount of impression material to the lingual area to form an artificial floor of the mouth. This facilitates pouring and trimming the cast.
If possible, pour the model within 15 minutes of taking the impression to avoid distortion caused by desiccation.
Likewise, storing the impression under water also causes distortion. If you cannot immediately pour the model, wrap the impression in a damp paper towel and place it in a plastic bag to retain moisture.
When working with alginate impressions, the model should be poured within minutes of when the impression is completed. This is necessary because alginate materials can start to distort after 5 minutes due to dimensional change.
If you cannot immediately pour the model, wrap the impression in a damp paper towel and place it in a plastic bag to retain moisture.
Mix the Stone
Techniques for mixing stone are critical for an acceptable outcome. Always follow manufacturer’s directions and use the measuring instruments that come with the product.
Follow these steps to ensure a reliable mix.
- Measure the water: Add the water to a clean rubber mixing bowl. Cool water decreases set time for the stone while warmer water speeds it up. Too much water prolongs set time and reduces strength while too little water makes the mix too thick and decreases the flowability.
- Measure the powder: Slowly add it to the water, allowing all the particles to become wet and avoid air trapping.
- Stir and spatulate: Begin stirring with a wide lab spatula. Spatulate thoroughly, pressing the material against the sides of the bowl until all the powder is absorbed. The consistency should be like thick cake batter or creamy peanut butter. The mix should hold its weight on the spatula and not be runny. Avoid vigorous whipping as this can introduce unwanted air bubbles.
- Vibrate the mix: Place the rubber bowl on a vibrator set to medium. Allow air bubbles to rise to the top and burst. This will take around 30 seconds.
Pour the Dental Model
After the stone is thoroughly mixed and air bubbles removed, you are ready to begin filling the impression.
- Fill the tooth depressions: Rest the impression tray against the vibrator’s edge. Place a small amount of stone on one of the distal ends of the arch. Allow the vibration to carry the material slowly across the impression, watching closely to ensure that the stone fills each depression with no air bubbles.
- Fill the impression body: When the tooth depressions have filled, add stone in larger amounts to a level slightly above the impression walls. Continue to vibrate to ensure complete coverage.
- Build the base: Place the remaining stone onto a tile or glass slab, forming a mound slightly wider than the impression. If needed, make a second mix of gypsum and water for the base.
- Invert the tray: Place it on top of the base, smoothing the sides up onto the stone in the impression. Take care not to lock the edge of the tray into the stone.
- Let it set: Stone mixtures take from 45 minutes to one hour to completely set up and obtain maximum strength.
- Separate the model: After the stone is set and is cool to the touch, carefully separate the impression tray from the stone. Surface damage may occur if the cast remains attached to the impression material as it dehydrates.
Trim the Dental Model
The dental model is now ready for trimming. Factors that influence criteria for proper trimming include the following:
- Size of patient’s arches
- Position of the teeth
- Preferences of the dentist or lab technician
- Purpose of the models
Keep the proportion of the base approximately half the thickness of the anatomic portion of the model. Be sure the base and occlusal plane are parallel to each other.
The cast should extend slightly past the retromolar pad of the mandibular and the hamular notch of the maxillary.
Ask Your Lab Technician
The primary audience for your models is your lab technician. He or she is the best source for guidance about how to best pour and trim your models so the restorations fabricated from them will meet your expectations.
The technicians at First Choice Dental Lab® can answer questions and concerns about pouring and trimming dental models.
Ready to get started? Contact us today, or complete the form below to request a fee schedule!
It’s time give your patients a reason to smile!
—
Bibliography:
https://www.dentalhygiene411.com/oral-health/pouring-dental-model/
https://www.augusta.edu/dentaltable/pdfs/patientexam/1-12-2PouringupStudyCasts.pdf
http://medical.tpub.com/14275/css/Pouring-Impressions-204.htm
https://quizlet.com/86759512/pouring-dental-models-using-the-inverted-pour-method-flash-cards/
Contact Us Today to Create a New Smile!


